
With the rollout of the all-new Windows 11, many people are curious about many of its features. With the new design of Windows 11, the features are quite different from the older versions of windows. One such feature is taking screenshots in windows 11. You may be wondering how to screenshot on Windows 11.
A screenshot is a useful feature in many aspects. We also attach many screenshots in our article for a better understanding of our readers. A picture explains a thousand words. You can take a screenshot of the whole screen or part of it. In this article, we’ll discuss how to screenshot on Windows 11.
How To Screenshot On Windows 11?
There are different methods to screenshot on Windows 11. You can use any of them according to your ease. Each method has its own merits and demerits. We’ll explain them in detail one by one.
1. Take a Screenshot Using PrtSc
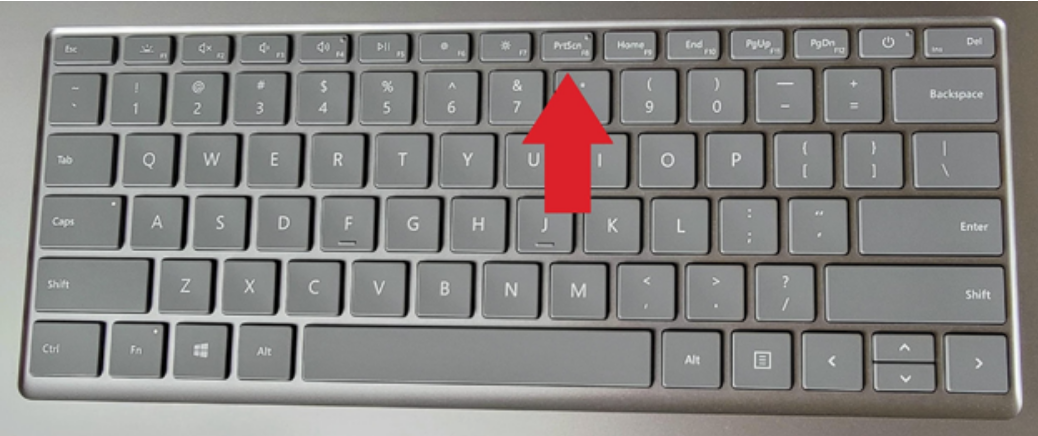
On your keyboard, the PrtSc button can be used to take a screenshot in Windows 11. If you have multiple displays, this captures everything on the screen, including the taskbar, the Start button, and any other open windows. The screenshot can then be pasted into any program that allows you to do so. Here’s how you can do that.
- Open the page that you want to take a screenshot of.
- On your keyboard, find the button called “PrtSc”. Press that button.

- Now open your paint application and press Ctrl+V. The screenshot will be pasted on Paint.
- Now you can crop the screenshot and use it according to you.
This is method is used if you have to edit the screenshot on paint. Other keyboard shortcuts can be used to take screenshots. But these screenshots are automatically saved on your PC. You don’t need to paste it into your Paint application.
While holding down the Windows key, hit the PrtSc key on your keyboard to take a screenshot. You’ll find the fullscreen screenshot you just took in the directory My PC>Pictures > Screenshots.
2. Screenshot Part of the Screen
There’s a keyboard shortcut by which you’ll be able to screenshot part of your screen. It may be a rectangular or free form of a screenshot. The shortcut for this snipping tool is Win+Shift+S.
The snipping tool activated by this three-button shortcut is far more useful than just the PrtSc button. By this method, you’ll be able to screenshot the whole screen but it has other features as well.
The screen will dim and a small menu will appear at the very top of the screen after pressing those three keys together. You can take different kinds of screenshots by pressing any of the four options.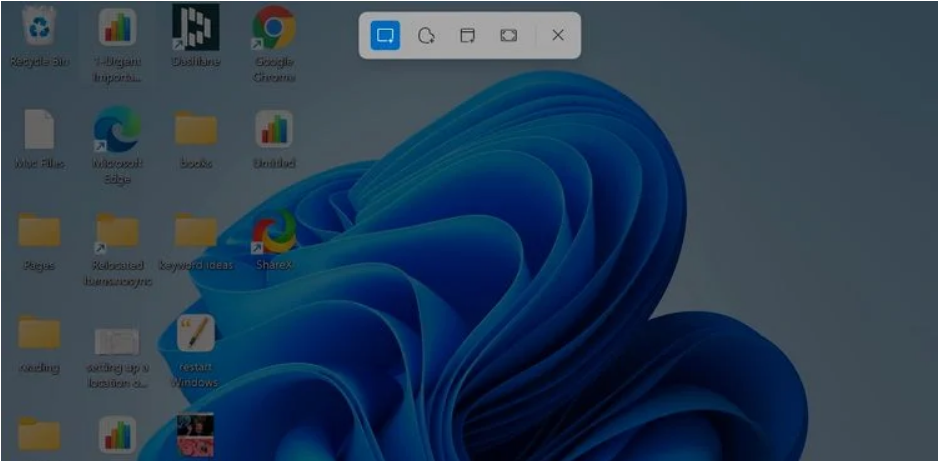
- Rectangular Snip – You can create a rectangle under which everything will be captured. If you just want a portion of the screen captured, this is the method for you.
- Free-form Snip – To use Freeform Snip, just design a shape that includes the information you want to snip. If the rectangular snip is too restricted, you may utilize this to get what you are looking for.
- Window Snip – Snip a picture of an open window using this feature. To acquire only one window, you may use this method instead of the rectangle snip, which requires a steady hand; it will automatically take a snapshot of just one window that too without a taskbar.
- Full-Screen Snip – This feature is similar to the PrtSc button. It takes a screenshot of the whole of the window as it is.
With the selection of the screen to take screenshots, the image will be copied on the clipboard. From there you can easily paste it anywhere.
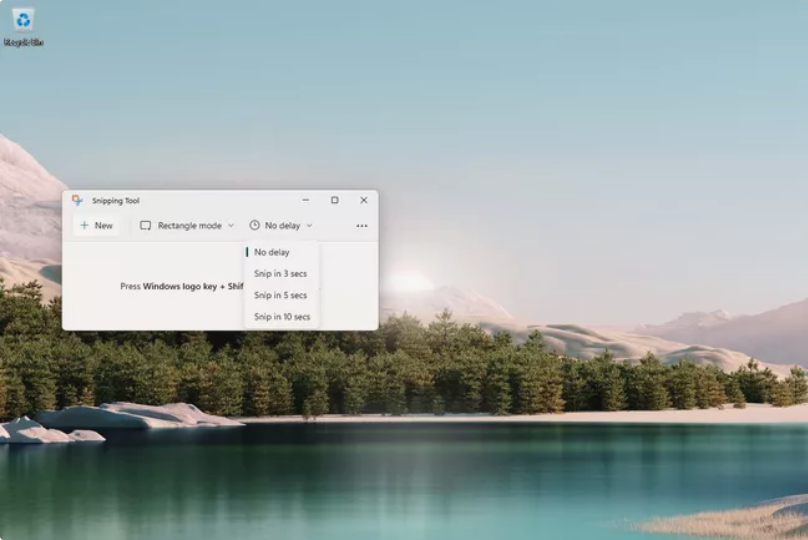
3. Delayed Snipping – Using Snipping Tool
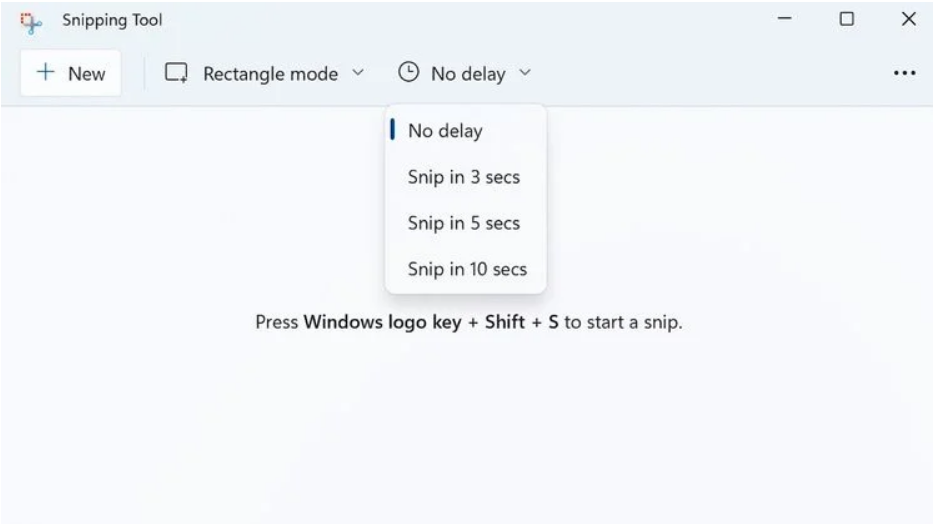
There are instances where screenshot-taking may hinder the process you are doing on PC. For those users, there’s an option known as delayed snipping. It is present in the built-in app called the snipping tool.
The above method is also done in the same app, but this requires the opening of the app. You can search in the taskbar for “Snipping Tool” and you’ll find the app. Here’s what you have to do after opening the app.
- In the list of menus, tap on the drop-down near the “delay” button.
- Select among the given time from 1 to 10 seconds.

- After selecting the time, tap on “New”.

- The app will appear after the time you have chosen. For example, if you have chosen 3 seconds in the delay time, the app will show up after exactly 3 seconds for you to take a screenshot.
These are all the best methods for you to take screenshots. I hope all your doubts on “How to screenshot on windows 11” are clear. To conclude, you can use the PrtSc button to take a screenshot of the whole screen. Also, you can press Win+Shift+S to open the built-in feature of windows to take screenshots.