
When it comes to iPad and iPhone accessories, Apple Inc. has never let us down. It was just a matter of time until Apple released its own Apple pen in 2015, after Samsung’s debut of the S Pen. The Apple pen is just stylish, compact and wireless. But, many people are dubious about charging the Apple Pen. Don’t worry, we are here to help.
In order to work with a variety of iPad models, Apple provides two distinct Pencil versions i.e. 1st and 2nd Generation. Both are powered by batteries and will eventually run out of power after using them for a while.
In this article, we’ll tell you how to charge Apple Pencils of 1st and 2nd Generation.
How to Charge 1st Generation Apple Pencil?
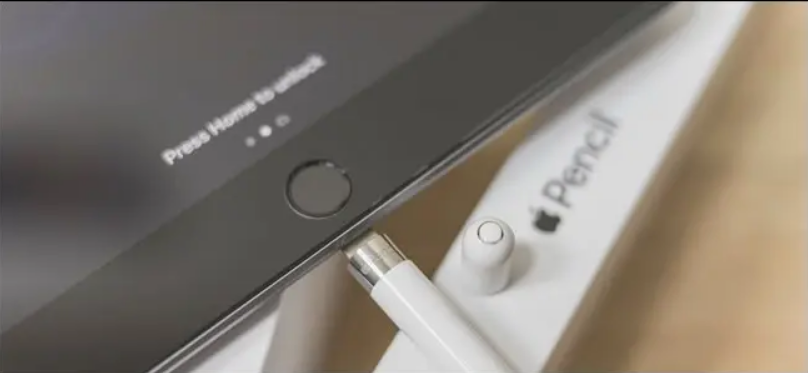
The first-generation Apple Pencil’s charging process is not very much straightforward. The first generation of apple pencils is compatible with iPads that have the home button and a lightning port.
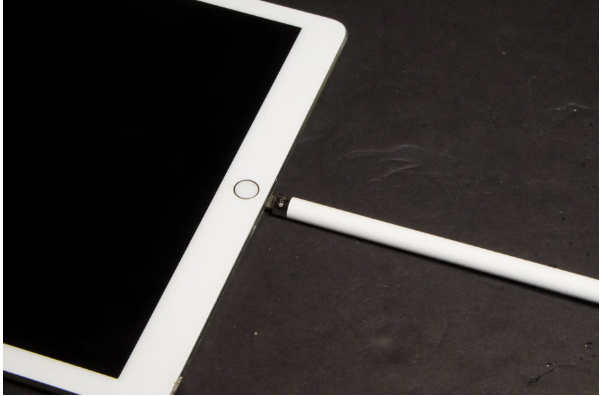
If you are not sure about the generation of Apple pencil you are using, the first-generation Apple Pencil is completely circular.
The process to charge and pair the pencil is almost the same. Here’s how you can charge your 1st generation apple pencil.
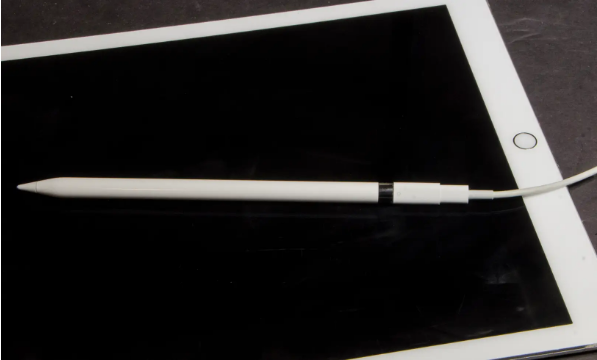
- Remove the top cap from your Apple Pencil and hold it in your hand. You’ll see that the Apple Pencil’s end has a Lighting connection.
- This lightning port of the pencil has to be connected to the bottom of the iPad. The iPad also has a lighting port.

- The Apple Pencil will begin charging when you connect. When you hear a ding sound, the charging will start.
- In around 15 to 30 minutes, the Apple Pencil will be fully charged.
You may utilise the Lightning adapter that comes with your Apple Pencil if you don’t enjoy charging your Apple Pencil via your iPad. To charge your Apple Pencil, connect it to the adapter and then to a Lightning cable.
How to Charge 2nd Generation Apple Pencils?
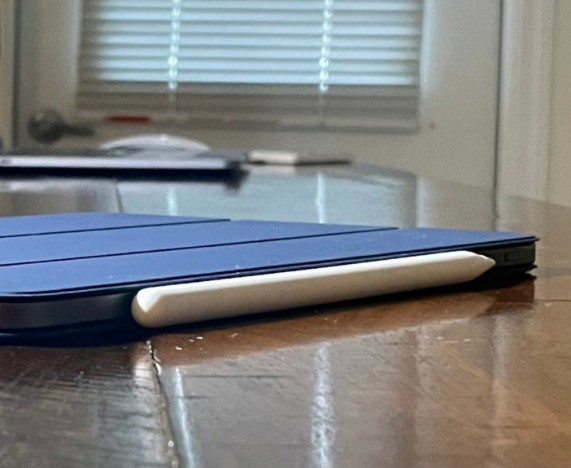
Apple’s second-generation Pencil has a much-enhanced charging experience. The iPad Pro and iPad Air models released after the second generation of the Apple Pencil were designed to be supported by it. In these iPads, the corners are flat and the Home button is not there.
Because it has a single flat edge, the second-generation Apple Pencil magnetically attaches to the iPad’s side (along with a programmable button). To charge and link your Apple Pencil, follow these simple steps.
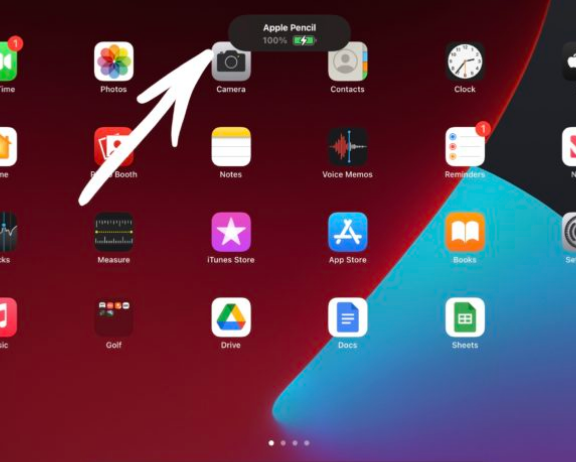
- Firstly, you need to put your 2nd generation Apple Pencil on the top of your iPad(when in landscape).

- You’ll notice a pop-up on your iPad that will notify you that the Apple Pencil is charging.

- You’ll also be able to view how much battery life is left.
That’s all you need to do to charge the 2nd generation. I hope this article was helpful to you. In case you have any issue charging the iPad, do let us know in the comment section below.