
With Steam, you can buy and play your favorite computer games digitally. You may download the game to your computer instead of traveling to a shop to purchase a physical copy, which is handy for most people. Even though this is a rock-solid feature-rich platform, problems can still arise.
Hundreds of millions of gamers use Steam to play their favorite games. Several strong features make the gaming experience better for players. It has a lot of useful features, including voice chat. This feature allows gamers to chat and engage with one another while playing games.
But many people are complaining about the sudden stoppage of Steam Voice chat. If you are also facing the same issue, you are at the right place. In this article, we’ll discuss the issue of Steam Voice Chat not working.
How To Fix “Steam Voice Chat Not Working” Issue?
According to reports, some users have had issues with voice chat on Steam. Audio improvements on your PC may cause a bug, which in turn triggers this problem. Alternatively, if you haven’t chosen a suitable microphone device in your Sound settings can also be a reason.
Steam isn’t authorized to record your microphone, so that might be another factor. Even if you don’t use it, it might be irritating since it prevents you from communicating with your friends and other players.
Let’s discuss some methods to solve the issue of steam voice chats not working.
1. Are You Using Right Mic?
Let’s take care of the obvious issues first before moving on to the more complicated solutions. This means that we must ensure that the suitable microphone is set as the default in Steam. Follow the below steps to check which is the default mic for Steam.
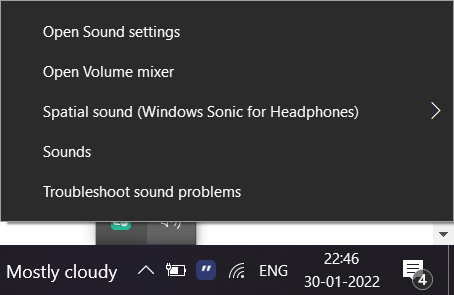
- On the right button side of your PC screen, right-click on the Sound Icon. From the list of menus, click on “Open Sound Settings”.

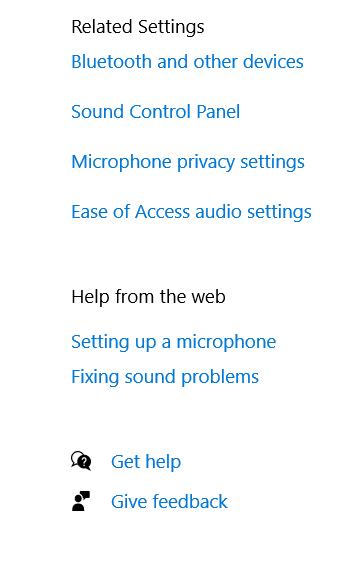
- On the right side of the screen, you’ll see the “Sound Control Panel” option under the “Related Settings” tab.

- Now tap on the Recording tab and select the default Microphone for your usage.
- Click on the “set default” button to save it. Now, check if the problem is persisting. If it is still there, let’s change the default mic of Steam as well.
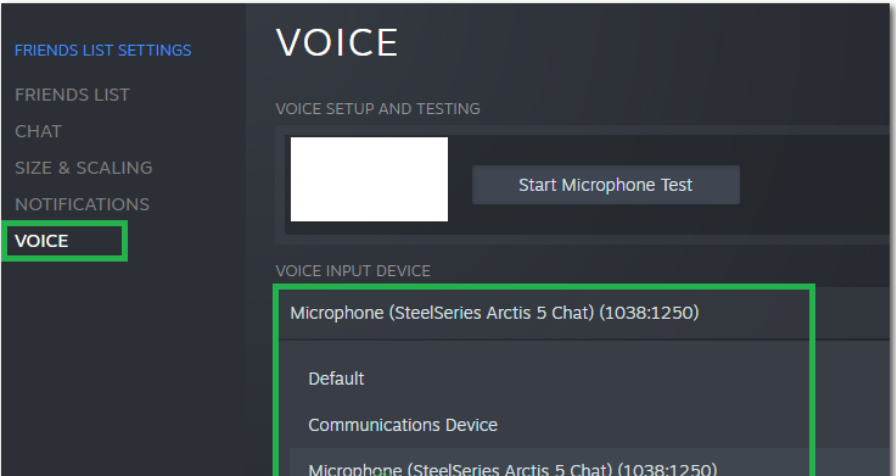
- In the Friends List window, tap on the “View Friends List” button. Now, select the “Cog Wheel”.
- Tap on the “Voice” and now select the input device from the drop-down list.

- Select your default microphone from the list and close the window after saving it. Check if the problem is persisting or not. If it is not solved, move on to the next method.
2. Sign Out Your Steam Account From Any Other Computer
In some cases, customers were able to fix the problem by understanding that their Steam account was being used on another PC. Signing out of the other computer was the remedy in this scenario.
The majority of people who’ve tried it say they’ve been able to reclaim their Steam voice chat immediately after doing so. If you think your account is being used on a separate computer, take a moment to think about it. Signing off on it will allow you to use the voice chat function again.
If you have no access to the other PC, simply change the Password of your steam account and all your accounts will be signed out automatically. If this doesn’t help you out in solving the issue, move on to the next method.
3. Disable Audio Enhancement
Windows’ built-in Audio Enhancement features may be the reason for this issue, in which case you may try turning them off to see if that helps. Many others have had success with this approach. And you may also try to see if it helps or not. To disable the audio enhancement function, perform these steps:
- On the right button side of your PC screen, right-click on the Sound Icon. From the list of menus, click on “Open Sound Settings”.
- On the right side of the screen, you’ll see the “Sound Control Panel” option under the “Related Settings” tab.
- After that, go to the Playback tab. Now, right-click on your Microphone Device.
- Select the Properties option and then click on Enhancements.
- Lastly, choose the “Disable All Enhancements” option and then click on the Apply > OK button to save the changes.

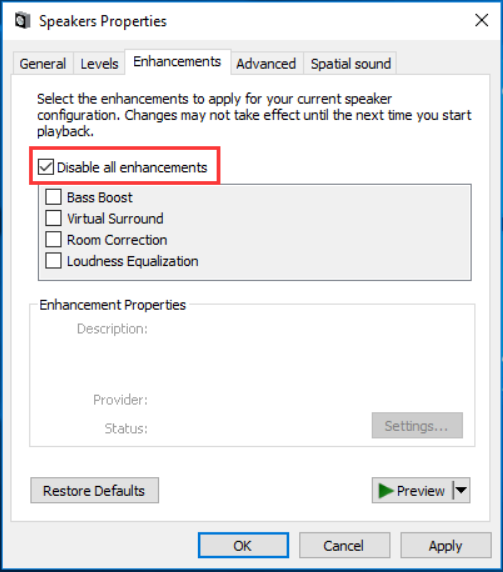
By this, you’ll be able to disable the audio enhancement. Check if this method works out for you.
4. Change The Privacy Settings
If the privacy settings were altered during an update, you may face this issue. As a result, we’ll be making a few tweaks to our microphone’s privacy settings in this method. Follow the below steps to do so.
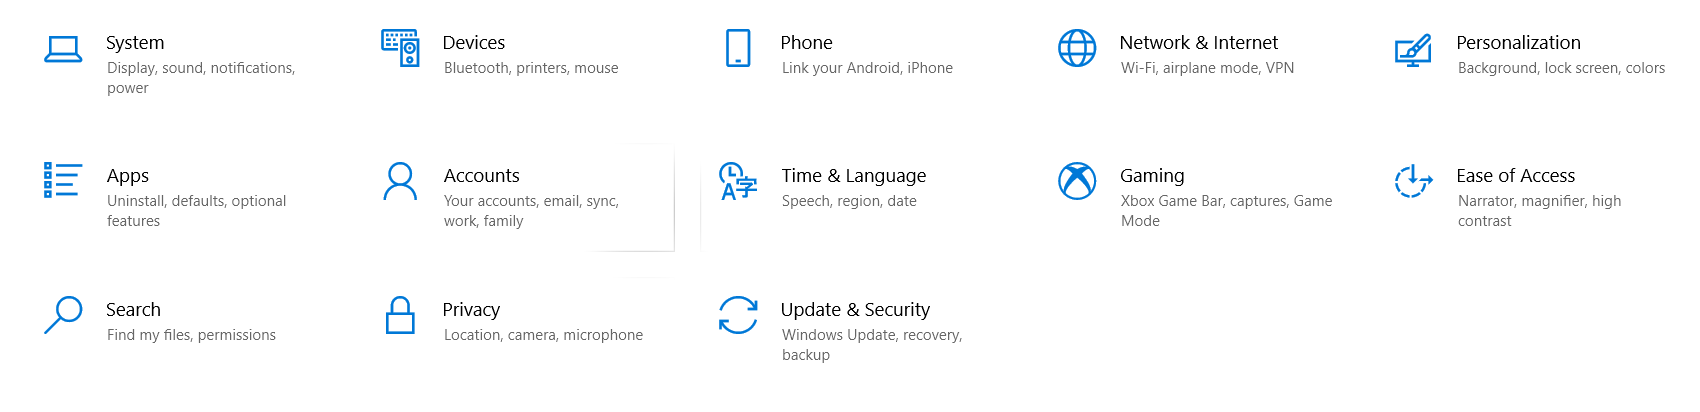
- Simultaneously press the Windows+I button to open Settings.
- You’ll see a lot of options, click Privacy among them.

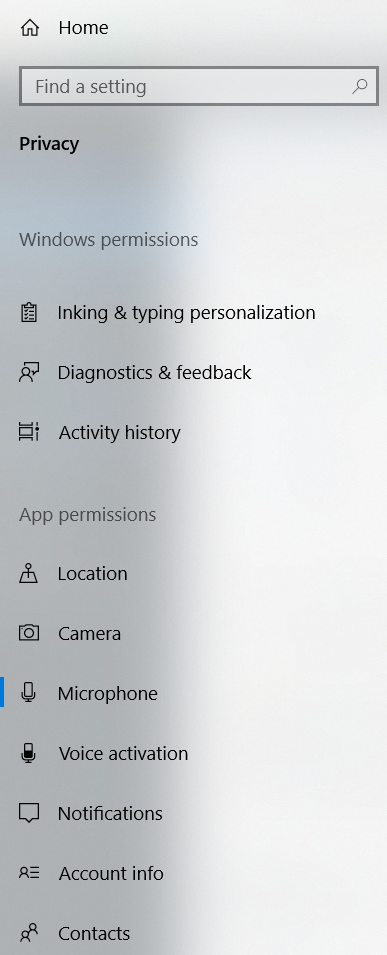
- On the next page, click on Microphone from the left pane.

- Then, toggle On the option “Let apps use my microphone”.
After this last method, check if the problem is persisting. If yes, you have to call the customer service of Steam or Mail them your issue. They’ll guide you to solve the issue. I hope you liked the article and it solved your problem. In case of any issue performing the above-mentioned steps, do reach out to us through the comment section below.